

Bauhaus Apron
Products Studio II: Jan – Feb 2024
Problem
Researched the history and work of the Bauhaus movement. Then using three pieces of work from Marcel Breuer, Wassily Kandinsky, and Oskar Schlemmer I developed concepts for wearables.
Wassily Kandinsky


Marcel Breuer


Oskar Schlemmer


Concept Refinement and prototyping


material Selection


I had always imagined this design with the metal bars used in actual furniture but due to limitations of shop tools and budget it was ruled out until I found a broken chair at a coffee shop on campus
Planning
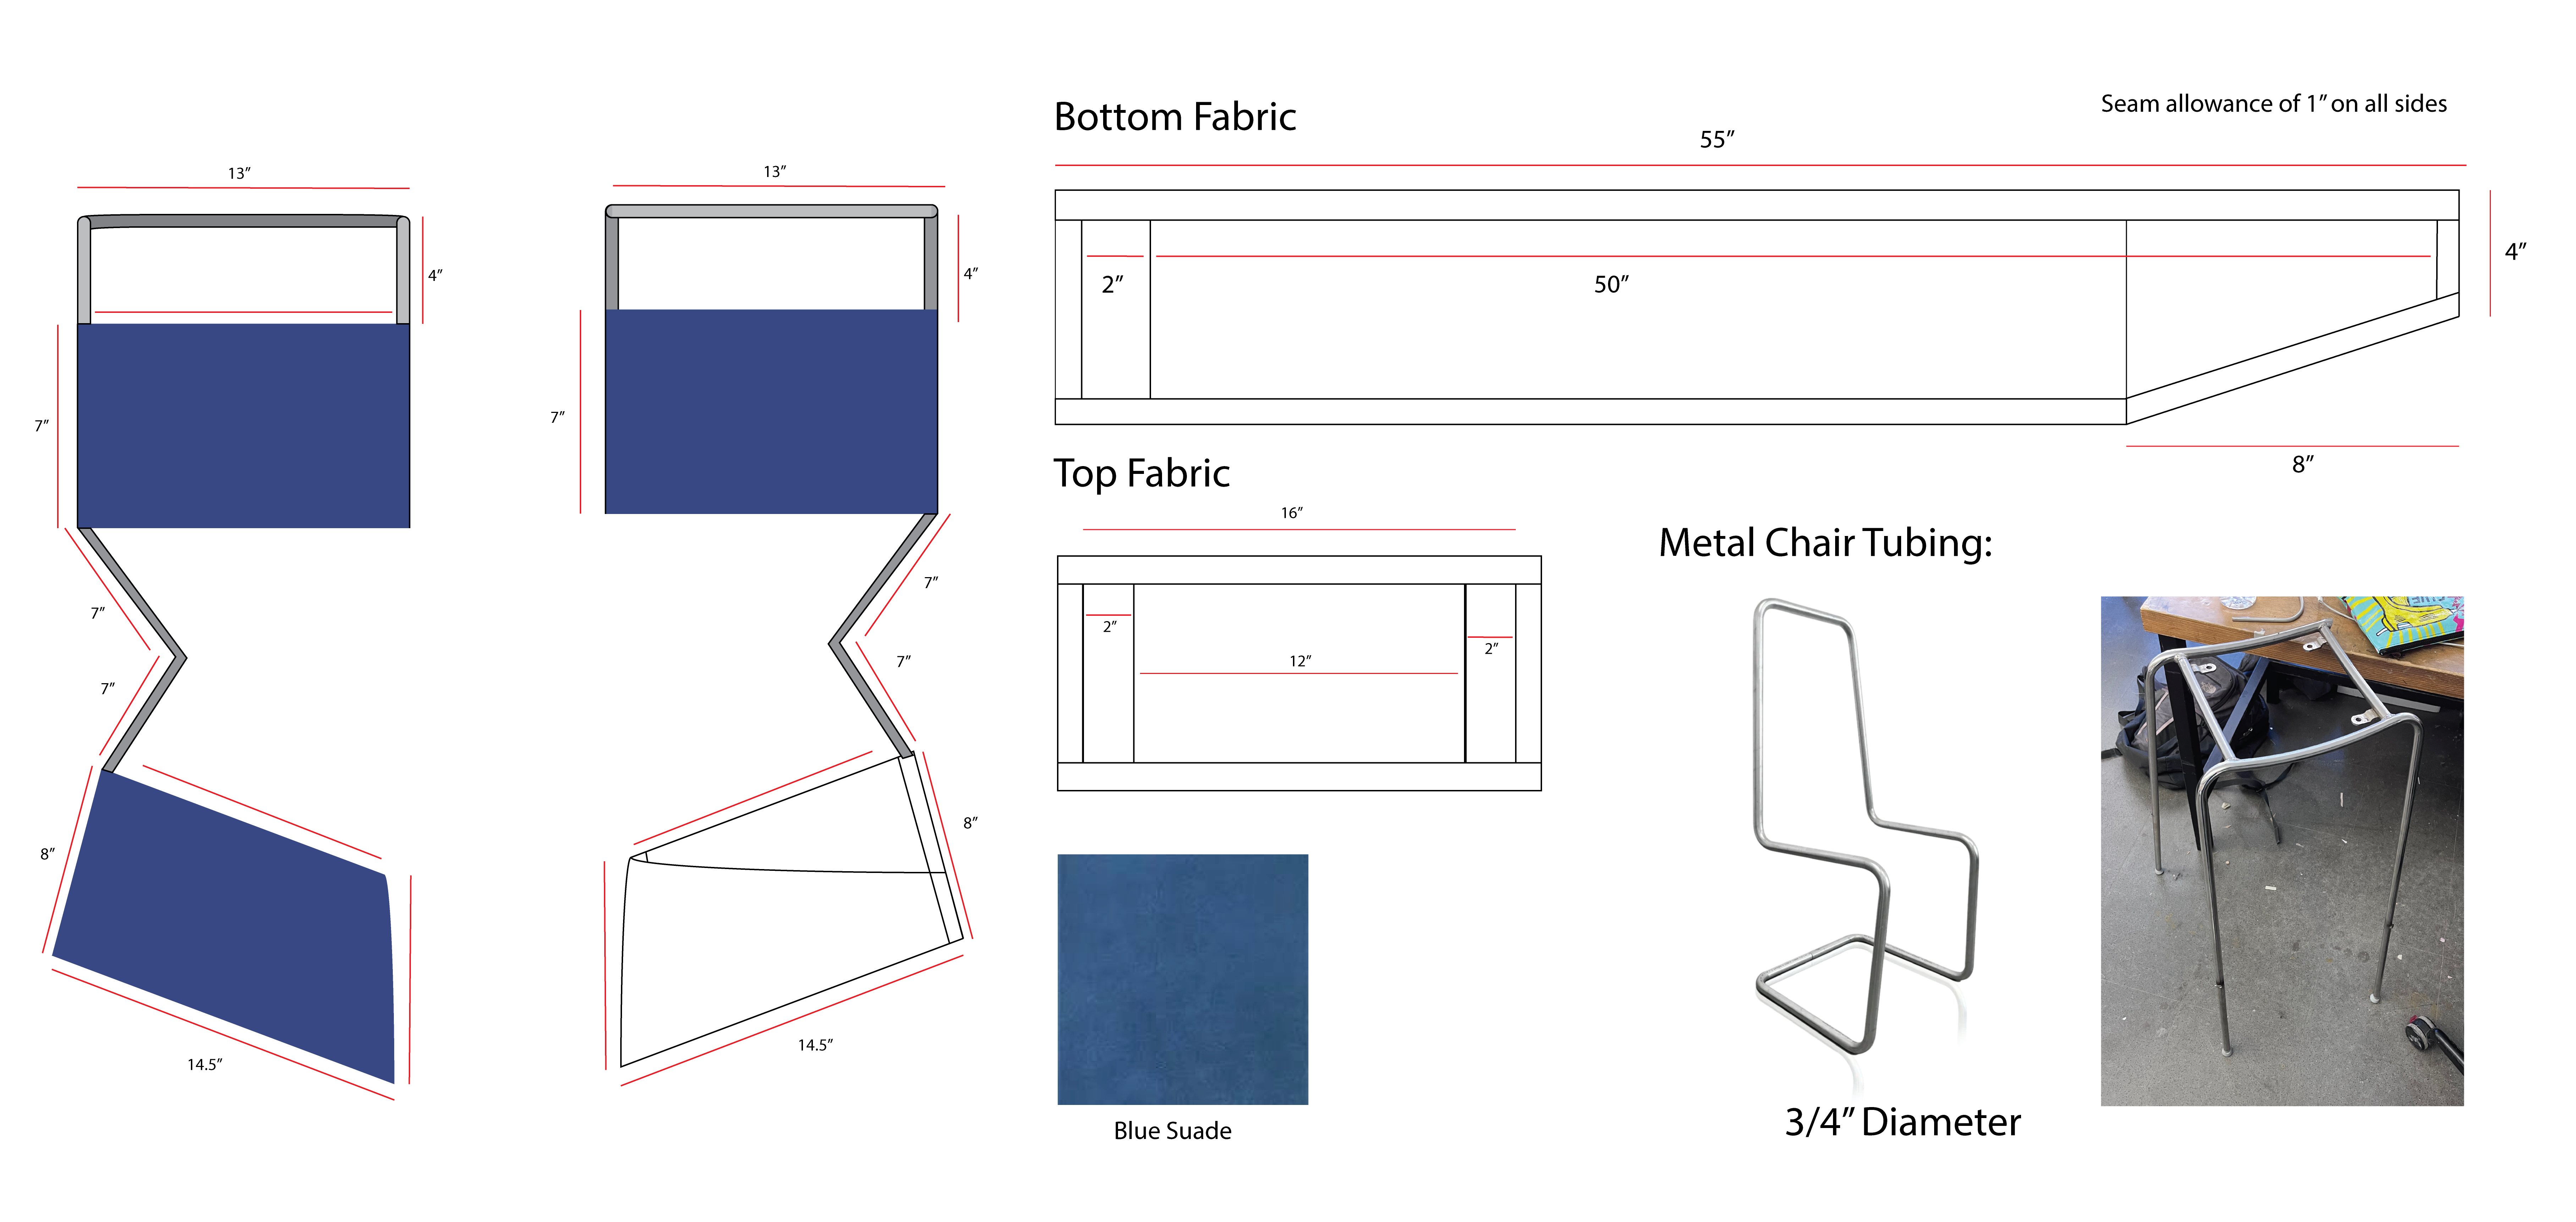
Using paper and tape I tried out different angles and dimensions before settling on the desired angles and creating a guide to refer back to between each step.


TechPack

Developing a bending process
While I now had the ideal material I had to figure out a way to bend it.

I took the cut up pieces of pipe and plugged one end and filled them with sand to prevent collapse and cracking under the pressure of the bending.
Using a bench vice I secured the tube in place against a larger tube with the desired radius of my curves.


Attachment and refinement
Using different tools to widen and flatten connecting points I attached the different parts of the frame using a ridged bar and hot glue. Using a bench grinder and hand filling I removed excess welding from the original chair.


Final Assembly


Sewing and Final touches


Final product


(255) 352-6258


